Blitzprint makes it easy.
Whether you need self publishing services or you’re simply looking for a book manufacturer to print books, Blitzprint can help.
From book development to book printing to binding services, we’re here to guide you though all the options so you can make the right choices.
Binding Options
| Preview | Binging Type | Page Ranges | Details |
|---|---|---|---|
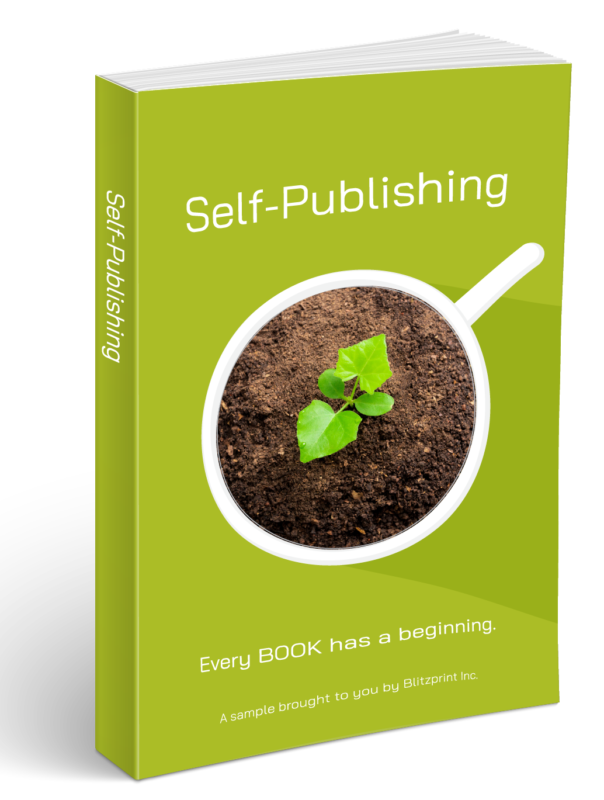 |
Perfect Bound/Soft Cover | 32 – 1000 pages | The most common book we produce. |
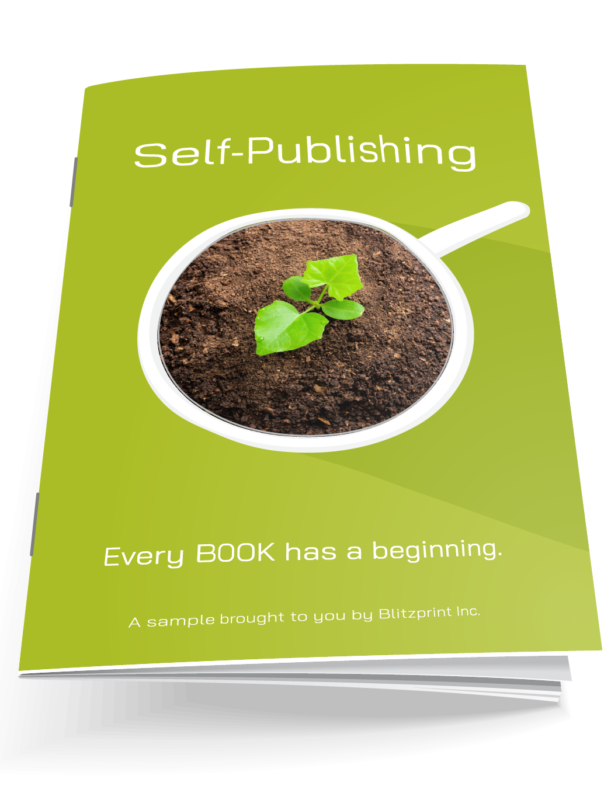 |
Saddle Stitch | 4 – 32 pages Page count must be divisible by 4 |
Our most affordable binding option for shorter books. |
 |
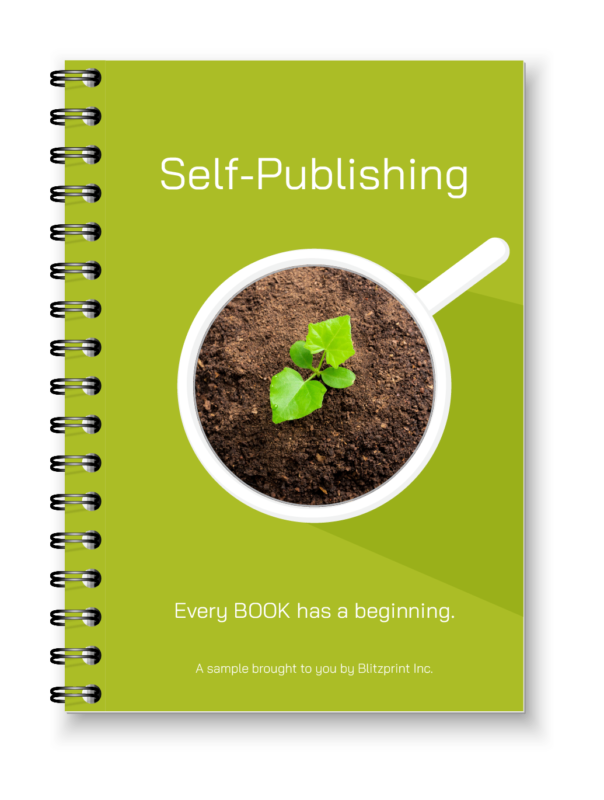
Plastic Coil | 4 – 500 pages | For books that need to lay flat and stay open for reading or writing. Multiple coil colours available. |
 |
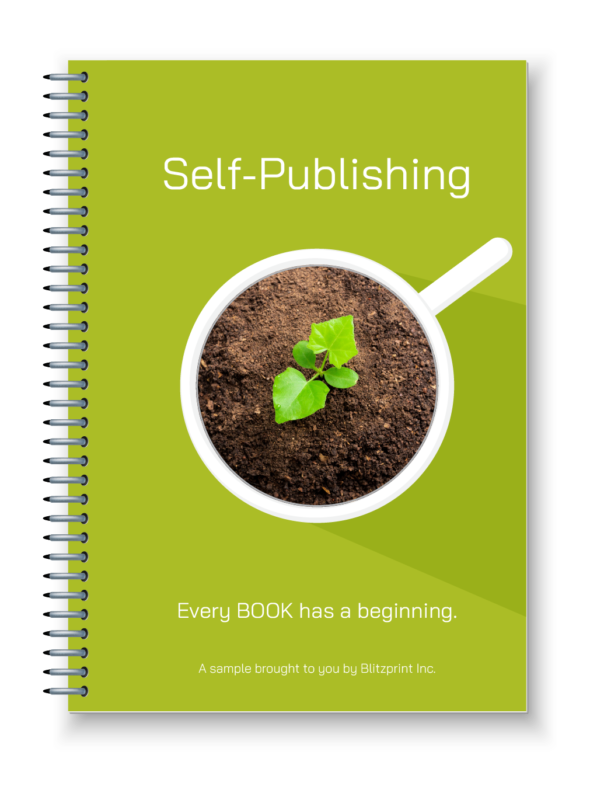
Wire-o Coil | 4 – 500 pages | For books that need to lay flat and stay open for reading or writing. Multiple wire colours available. |
 |
Litho Wrap HardCover | 32 – 1000 pages | A hard cover binding that offers great versatility and impact. |
 |
Hard Cover W Dustjacket | 32 – 1000 pages | Hard Covers offer great versatility and impact |
* Paper choices may have some effect as to how many pages can be added to the book binding options above.
We can help you make the right choice. Add your requirements to your quote request and we will be in touch if changes are needed.
Paper Choices
Colours
95% of the paper that we print on are either a white or natural colour.
White

Natural

Both paper colours work well with text and/or photos.
Interior Papers – Uncoated Paper Stocks
Uncoated paper stocks are our most commonly used printed material. They are an excellent choice for family memoirs, fiction, poetry, children’s books, and more.
| Weight & Color | Best Used – page counts | Best used – Binding types |
|---|---|---|
| 50lb White/Natural | Used for books that are 300 pages or more. | Perfect bound, coil bound, litho wrap cover, Case bound. |
| 60lb White/Natural | Used for books that are less than 300 pages. | Perfect bound, coil bound, litho wrap cover, Case bound. |
Other Interior Paper Choices
If you are printing high end color photos such as coffee table style books, portraiture, art, or nature photography we can suggest other paper stocks as well. Please indicate on the quote form in the comment section.
Cover stock
These stocks are chosen here at Blitzprint, that is directly related to the paper stock that has been printed for the interior.
Cover Lamination
Lamination provides your cover some protection and longevity, the lamination type is a preference.
Gloss Laminate
- Gloss laminate has a shiny appearance, reflective like a quality photograph print.
- As a result, gloss really shines on covers with photographs or elaborately designed covers.
- Does not show fingerprints on covers that display full solid dark colors.
Matte/Soft Touch Laminate
- Soft-Touch Matte has a more muted appearance showing less glare.
- Generally, soft touch displays better on covers with a smaller colour palate or patterns.
- Adds a soft touch feel to the cover.
UV Spot Coating
- For that extra something, consider UV Spot Coating.
- A clear gloss image that works best with soft touch laminate.
- UV Spot Coating slightly raises a defined image or text of your choosing.
Formatting, Design, and Proofing Services
The old saying of “don’t judge a book by its cover” unfortunately doesn’t hold true. Many people do select a book based on its appearance. Blitzprint has a team that can help you to create a professionally designed cover and interior. You worked hard on your book, and now is the time to make sure your book will appeal to your audience.
| Interior | |
|---|---|
| Book Interior Formatting $89.00 / hour | Per Page Corrections $2.40 / page |
| Cover | |
| Design from concept/description $89.00 / hour | Formatting with supplied artwork, photographs, and general design $199.00 |
| PDF Digital Proof | |
| Included with all projects | |
| Printed Proof Copies | |
| Full Book w B/W Interior $89.00 | Full Book w Colour Interior $149.00 |